
SUPPORT
PIPER MAKE
BEAM BREAK
With Piper Make Beam Break, you will receive:
- Hot Wheels Car
- Hot Wheels Track (2)
- Hot Wheels Track Connector
- Sets of Infrared Sensors (2)
- Laser Cut, Laser Etched Wood Pieces
- Laser Cut Delrin Pieces
- Piper Make Sticker
Hardware Issues
I've got my kit — now what?
You will need a Piper Make Starter Kit to be able to use your Piper Make Walker! Grab your kit and computer (with a USB port) and head over to Piper Make Mission Control to start with the Starter Expedition. The first mission is "Getting Started" — the tutorial will walk you through building your first button!
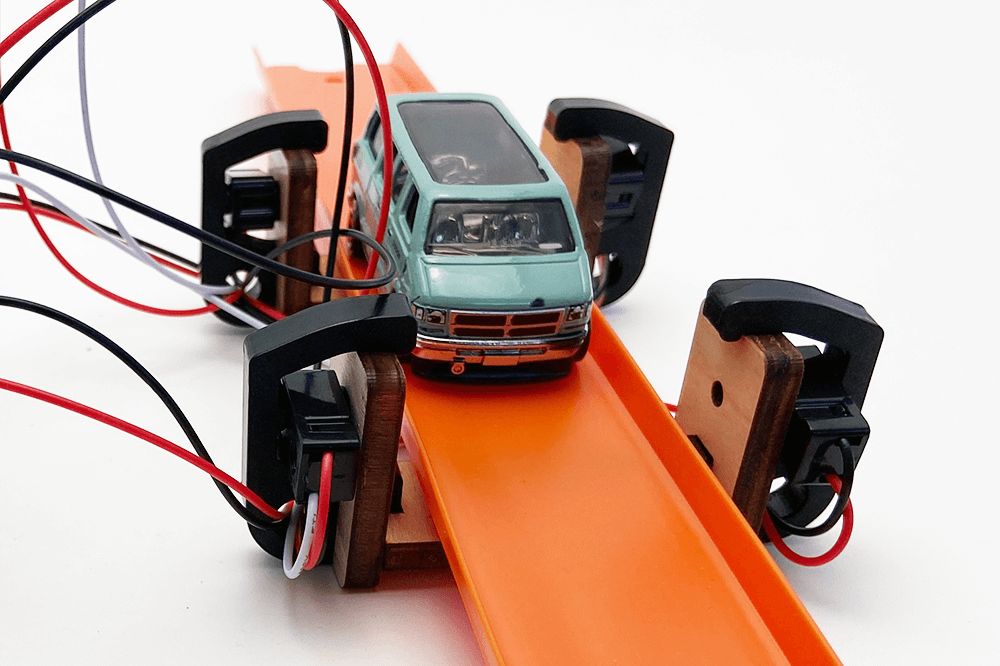
After you've understood Piper Make, grab your Beam Break and click the Motion Expedition. The tutorials will walk you through how to use Beam Break, but Step 1 is the build which you will do according to the blueprint in your kit.
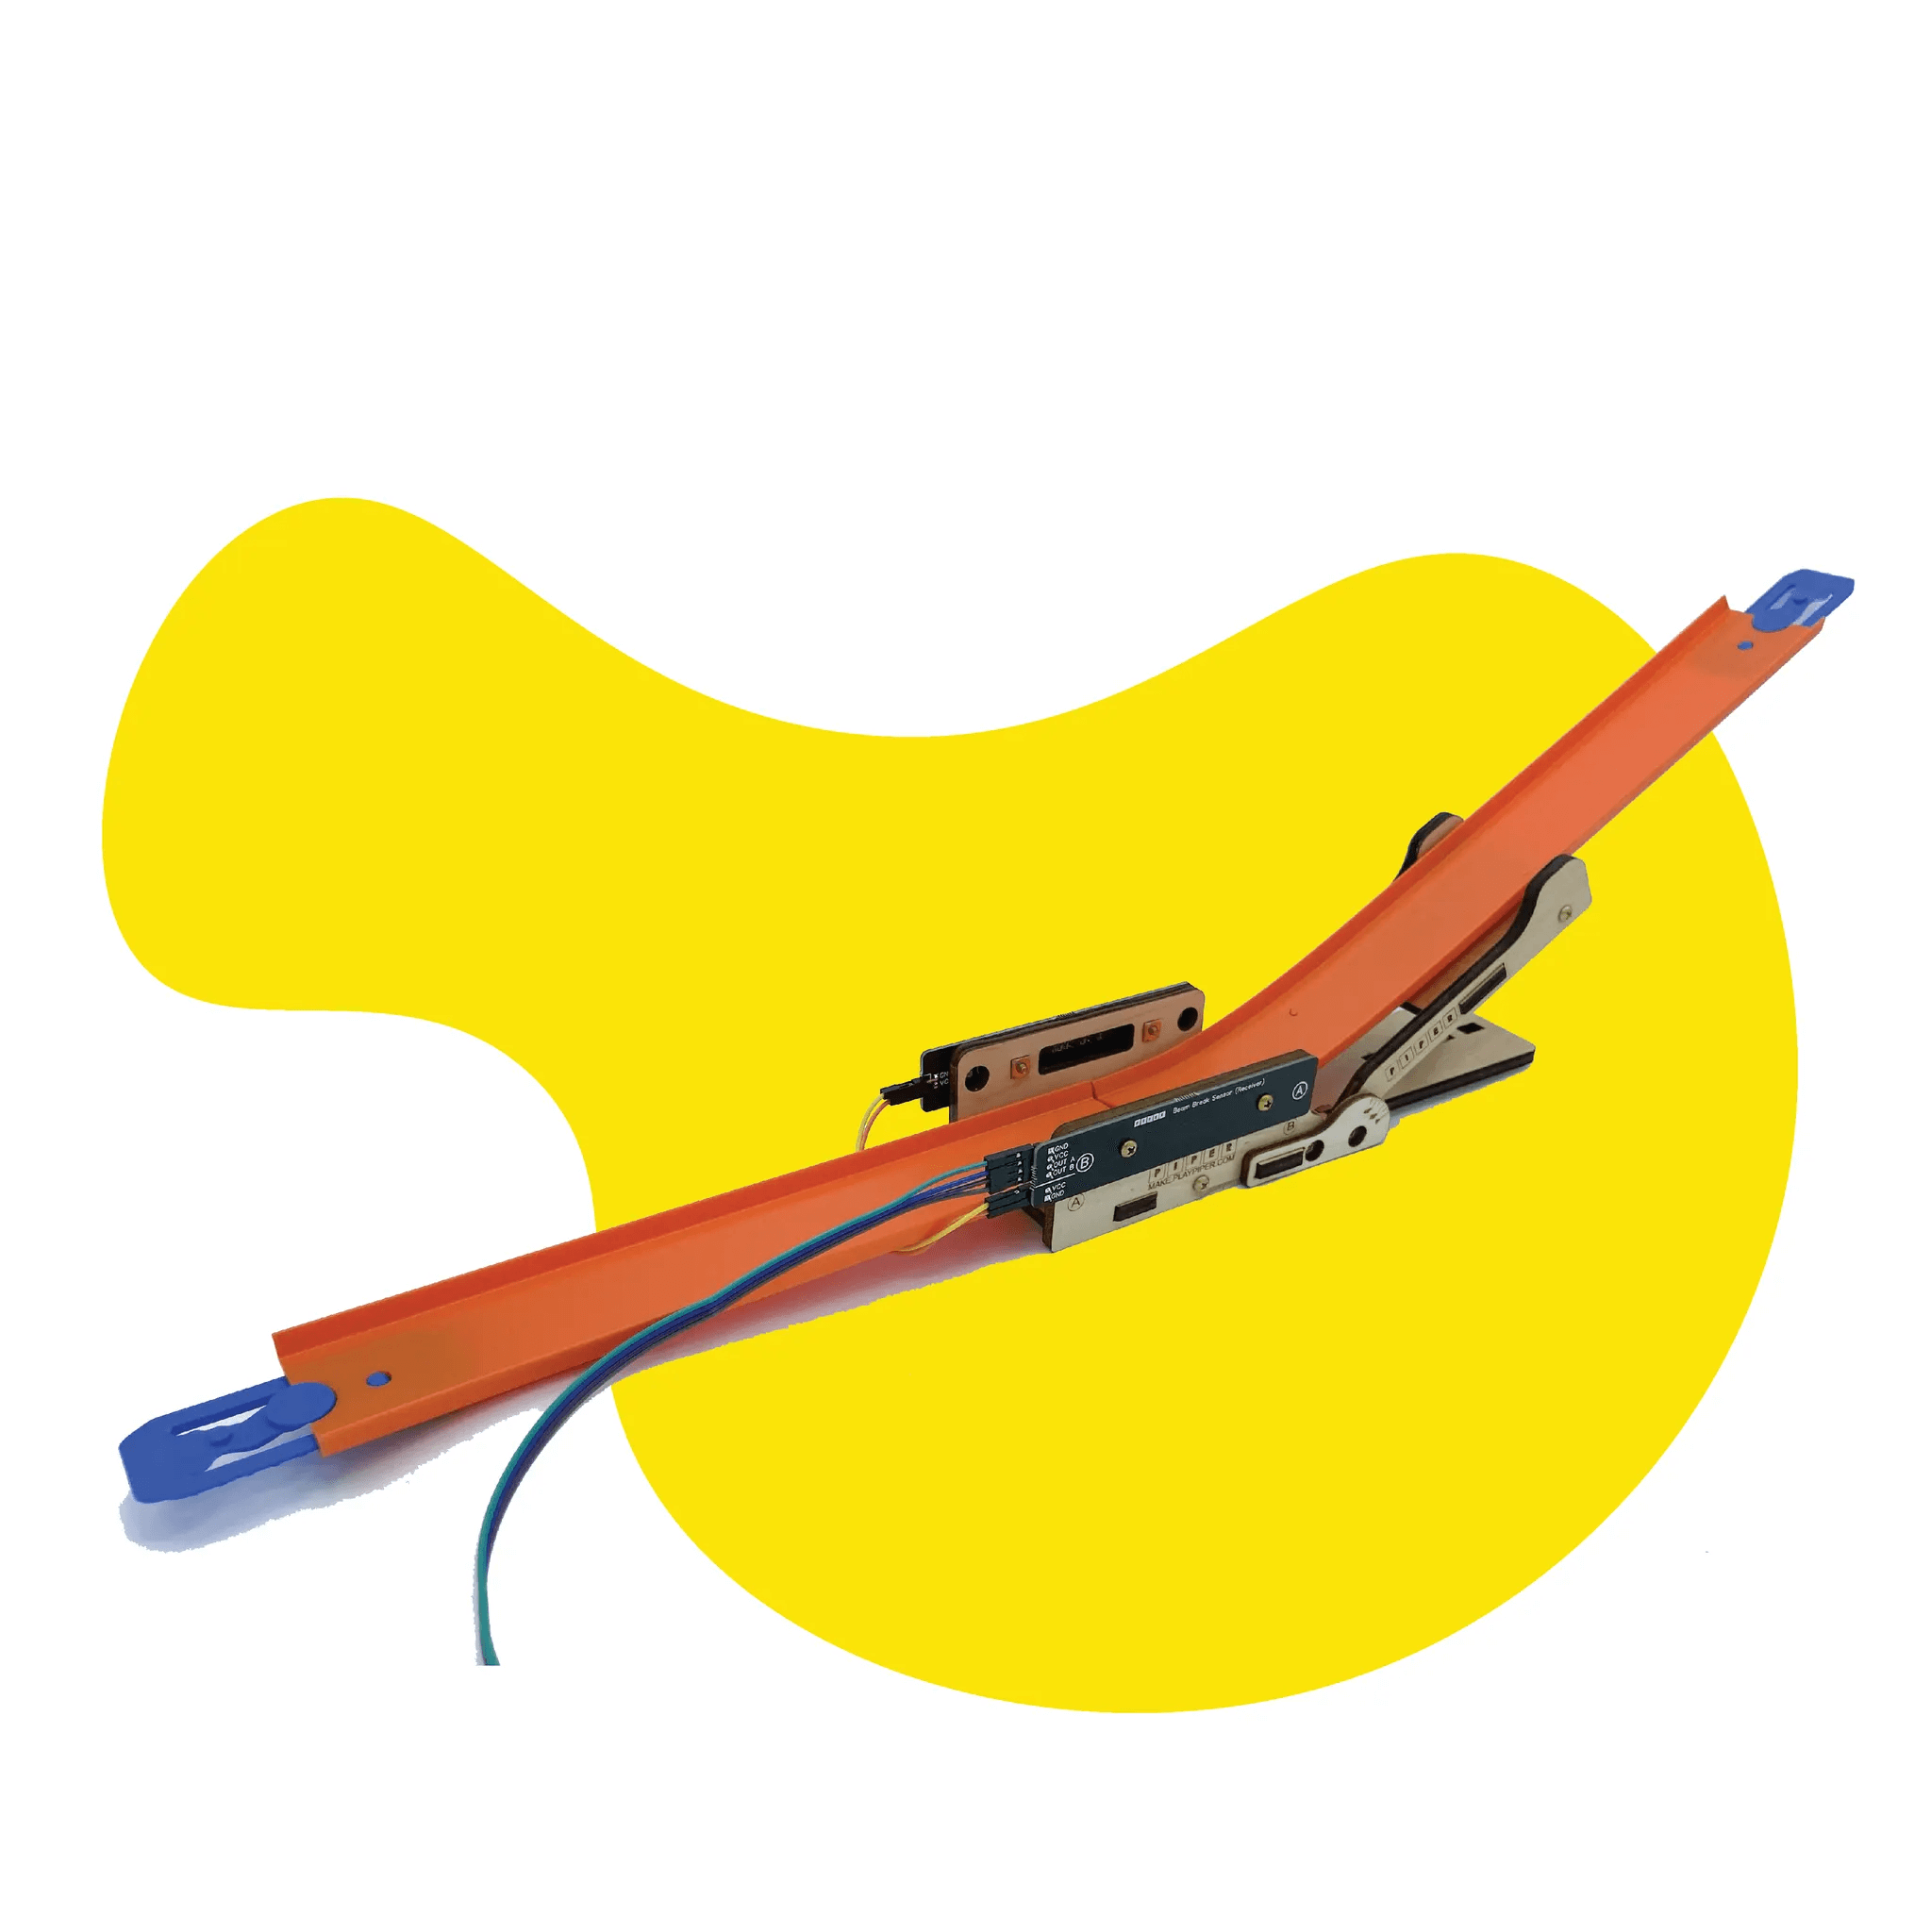
This is what the Beam Break looks like when built:

*As a quick note, there have been two versions of the Piper Make Beam Break. Take a look at your pieces to figure out which one you have:
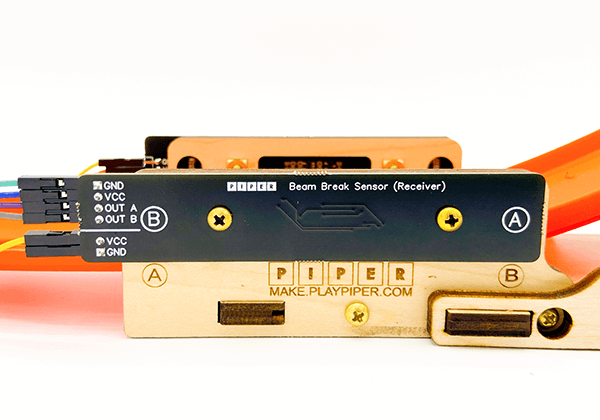
If you see sensors that look like this, you have a Version 2:
If you see sensors that look like this, you have a Version 1:
What circuits do I build with my Motion Ball?
The mission will guide you in building the circuit for your Beam Break and wiring everything up.
The wiring diagrams will look like these:

My Pico won't connect to Piper Make.
Using the Raspberry Pi Pico with Piper Make requires a DATA cable. Some USB cables are charge-only, which will not work with our products.
What version of the Raspberry Pi is included in the Piper Make?
The Piper Make Starter Kit includes the Raspberry Pi Pico microcontroller.
Read more about Raspberry Pis on their site at: https://www.raspberrypi.com/products/
Software Issues
What is Mission Control? Where can I use it?
Piper Make Mission Control refers to our online drag-and-drop coding platform. It is free and open-source with missions that correspond to the hardware widgets you can buy in the Piper Make product line. Access it here:
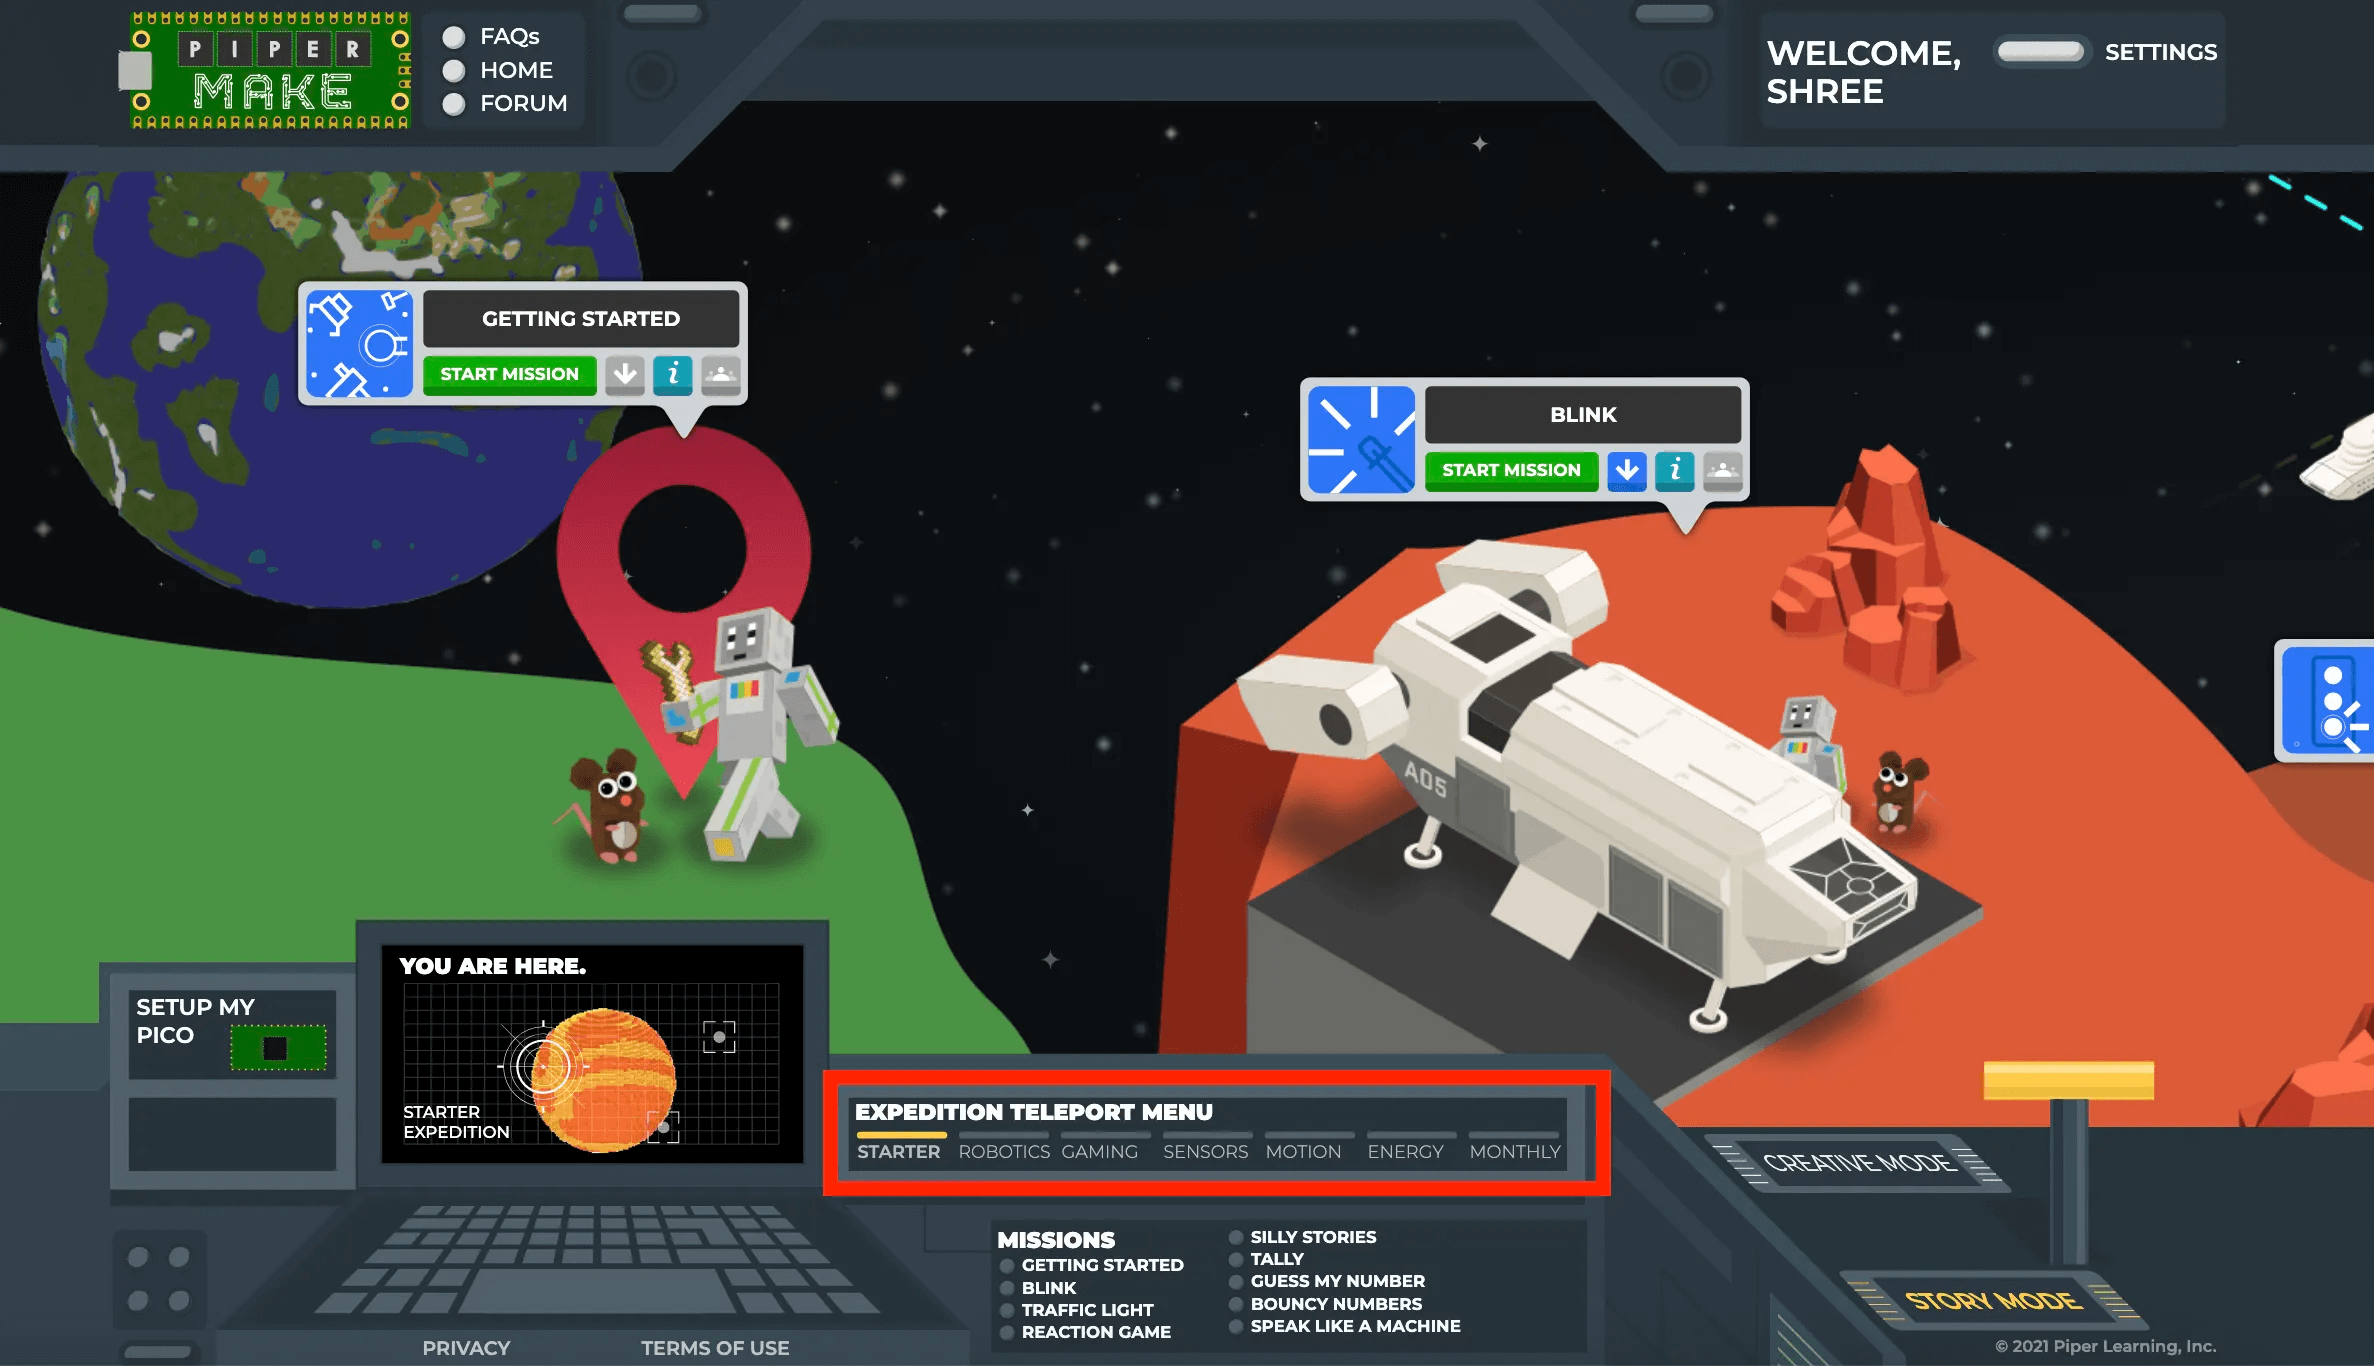
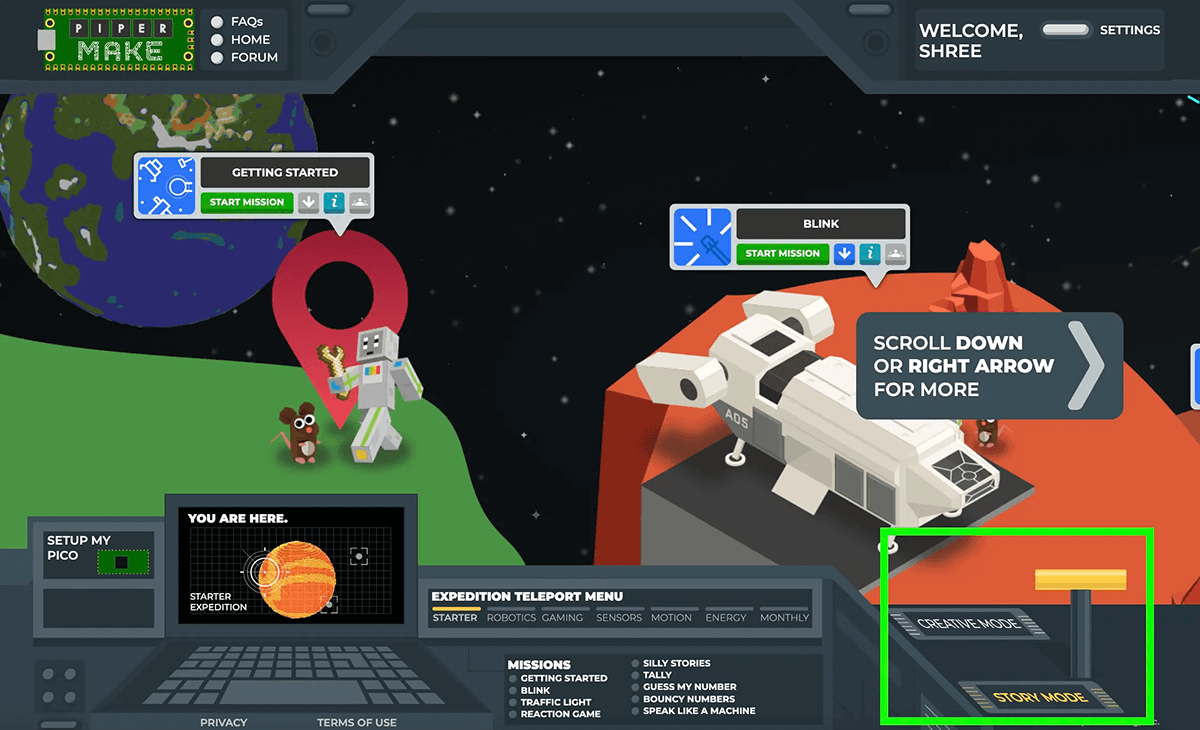
When you access the site, you will land in the Starter Kit Expedition with the mission "Getting Started" first on your screen. Scroll or click right arrow to see more missions in the expedition.
Once when you click into each of the missions, you'll see your Piper Make workspace.
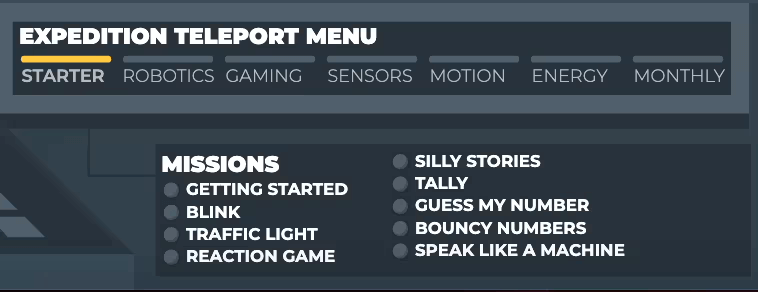
What are Mission Control Expeditions?
Piper Make widgets are designed to fit into career-connected missions that form a cohesive expeditions—whether Energy or Design or more.
On Mission Control, you can toggle between the Expeditions in the bottom panel:
You can use this bottom panel to see each of the missions in the expedition. For the Piper Make Starter Kit Expedition, you can select the missions from the panel or from the individual tiles.
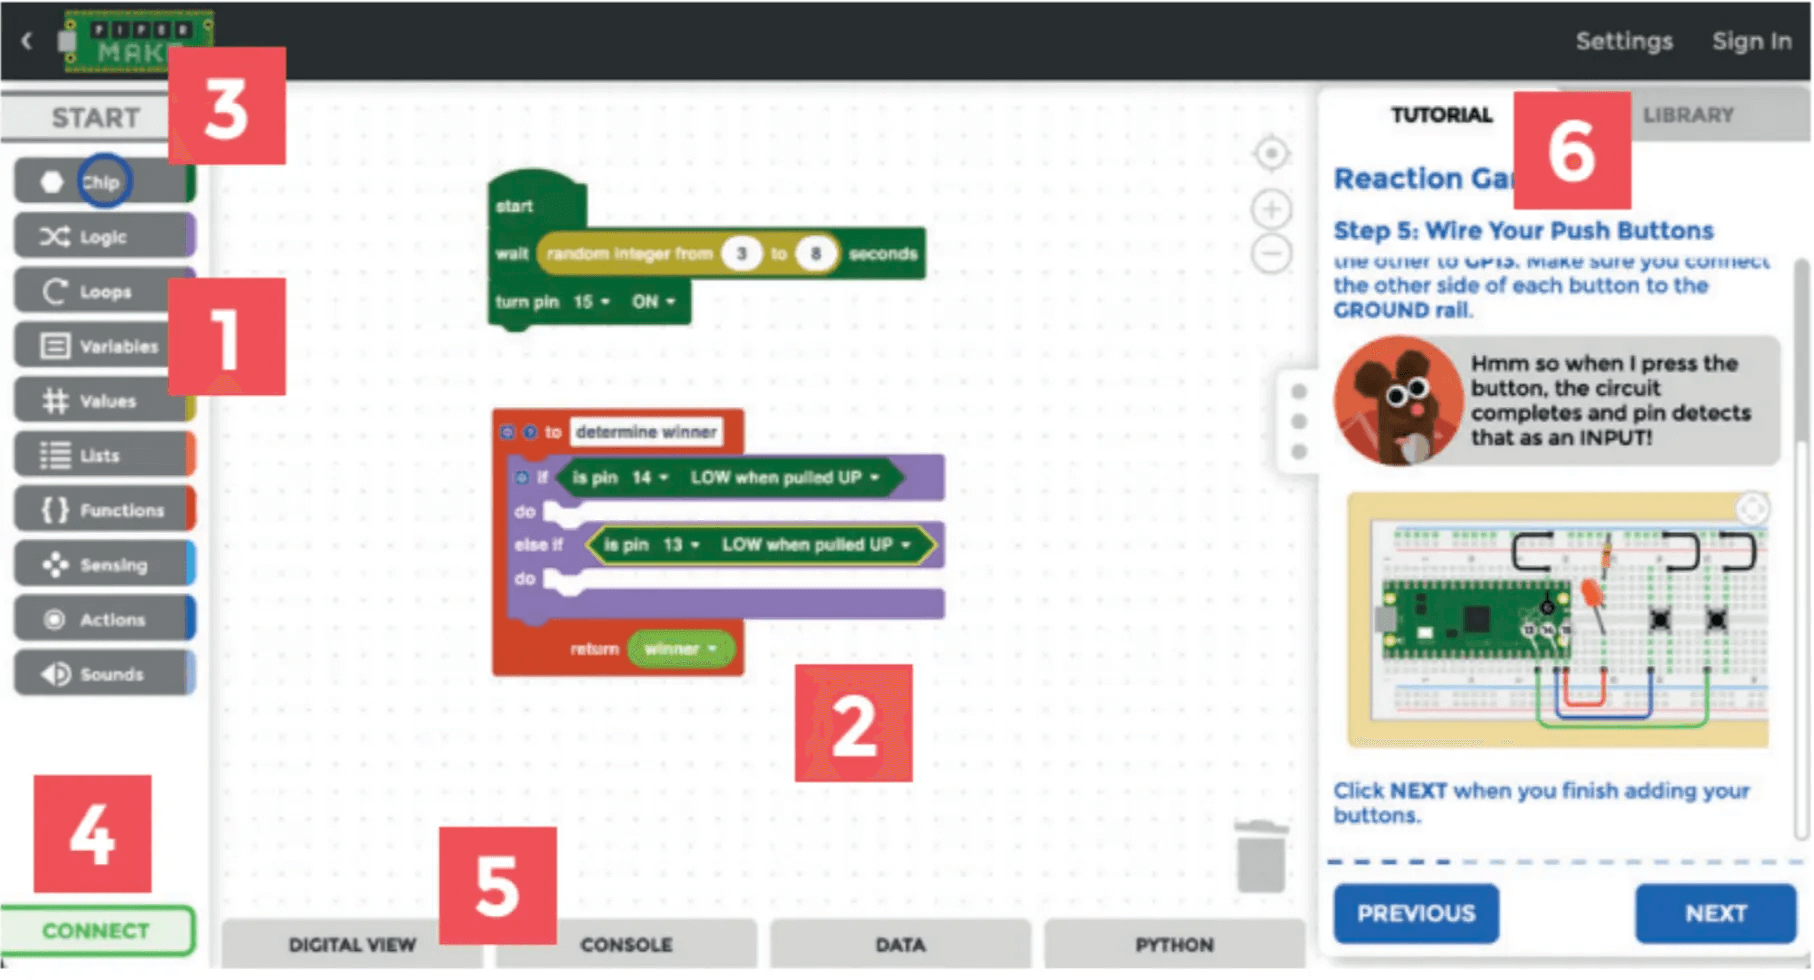
What are the parts of the Piper Make Workspace?
Once you click into a mission, you will see a screen like the following. The individual parts are:
- BLOCK CATEGORIES: Code blocks are arranged into helpful color-coded categories. Click on one to reveal its collection of blocks.
- CODE AREA: Drag blocks into the central area to add to your program. You can drop a block under or into another one to connect it.
- START BUTTON: Click the Start button to run your program on the connected Pico.
- CONNECT BUTTON: Click this button to connect the user interface to the Pico plugged into your computer.
- DIGITAL VISUALIZER ELEMENTS: Click one of the tabs here to reveal one of four visualizers.
- DIGITAL VIEW: lets you see if your running program, when you hit Start, is sending signals to particular pins.
- CONSOLE: displays what the program is doing in real-time.
- DATA: lets you view the data being sent from various inputs.
- PYTHON: shows a text version of the MicroPython
program you’ve created.
- TUTORIAL/ LIBRARY: If you are doing one of the Maker Challenges, this is where you’ll see instructions for what to do. The Library tab gives info on components.
Who are Piperbot and Pip in StoryMode?
Piperbot and Pip are our trusty Piper characters who were first created for the Piper Computer Kit storyline. Piper Make serves as their prequel, telling the story of their journey together on Mars — and a whole cast of characters they run into!
Check out the videos at the beginning of the missions (like this one for Tally) to follow the stories for each of the missions!
What is Creative Mode?
Creative Mode allows you to create new projects.
A new project is a blank canvas for you to complete our Maker’s Challenges or create whatever you want. To access Creative Mode, flip the switch in the lower right corner:
What Google Tools are integrated into Piper Make?
Piper Make is integrated with Google Tools to make sharing and using the software easy.
Google Sign On
From the make.playpiper.com homepage,
click ‘Sign In’ at the top right and sign in with your Google
Classroom educator account, then click on Allow for all
the permissions required by Piper.
Google Classroom Share
To share a Maker Challenge project with a class, click the classroom icon at the top right of its icon on the homepage. Choose a class from the first drop-down, then select ‘Create assignment’ from the second drop-down. Click on Go, add any instructions you like, then click Assign to post it to the class.
Share to Drive
To save a PNG image file of your code blocks for a project, click the down arrow icon next to its icon on the homepage. You then have the option of downloading the file or adding it to your Google Drive.
EDUCATOR GUIDES
Piper Make Beam Break
Beam Break Demo

NEED MORE SUPPORT?
SHOP
SUPPORT
COMPANY
LEGAL

©2024 Piper Learning, Inc